Kitchen design in cramped quarters often feels like solving a puzzle with missing pieces. You’re juggling limited counter space, awkward corners, and barely enough room to move around while cooking.
Be that as it may, the right approach can transform even the tiniest cooking area into a functional, beautiful space. A well-planned modular kitchen for small apartment living maximizes every inch without sacrificing style or efficiency. Whether you’re renovating or starting fresh, installing a modular kitchen in small apartment spaces requires strategic planning across five key areas: layout selection, storage optimization, workflow zoning, material choices, and lighting design.
Step 1: Assess Your Space and Choose the Right Layout
Space assessment forms the foundation of successful modular kitchen design. Without accurate measurements and traffic pattern analysis, your layout decisions lack the data needed for optimal functionality.
Measure Your Kitchen Area Accurately
Start with basic dimensions using a reliable measuring tape. Record the length, width, and height of your kitchen space in both feet and inches for precision. Sketch your kitchen from an overhead view, marking doors, windows, and existing service points on paper or a planning grid.
Measure horizontal surfaces wall to wall, including areas without current cabinetry. For walls with windows, record window length and the space between any windows from the outside of the frame. Measure door frames similarly, noting their swing direction as this affects cabinet placement and appliance positioning.
Following this, measure vertical distances from floor to ceiling. If bulkheads exist, measure them separately. Record the height from floor to window bottom, then the window height itself. Where possible, repeat horizontal and vertical measurements 600mm in from the wall to identify uneven surfaces.
Mark all service points including rangehood ducting, incoming water sources (typically inside sink cabinets), wall waste pipes, floor waste pipes, gas service points, and electrical connections for cooktop and oven. This documentation prevents costly mistakes during installation.
Evaluate Traffic Flow and Entry Points
Kitchen walkways need at least 36 inches of width for comfortable single-person movement. Work aisles (spaces in front of sinks, appliances, and prep areas) require 42 inches minimum, expanding to 48 inches for multiple cooks. Larger families or frequent entertainers benefit from 54-inch work aisles, allowing two people to pass behind someone actively working.
Maintain 36 inches of clearance between opposite counters. This spacing allows two people to work simultaneously without crowding. Plan 42 to 48 inches of clearance in front of appliances requiring door access, such as dishwashers and ovens.
Avoid placing major appliances directly opposite each other, as simultaneous use creates traffic jams. Keep appliances away from corners where doors prevent full access and adjacent cabinets cannot open. Leave sufficient space at entry points so doors and drawers can open without blocking passage.
Select a Layout That Fits Your Space
Different configurations suit different dimensions. Match your measurements to these proven layouts:
- Galley layouts: Work best in narrow spaces measuring 7-12 feet wide. Single-wall galleys place everything along one wall, while double-wall designs create cooking corridors. Maintain 36 inches minimum between opposing counters.
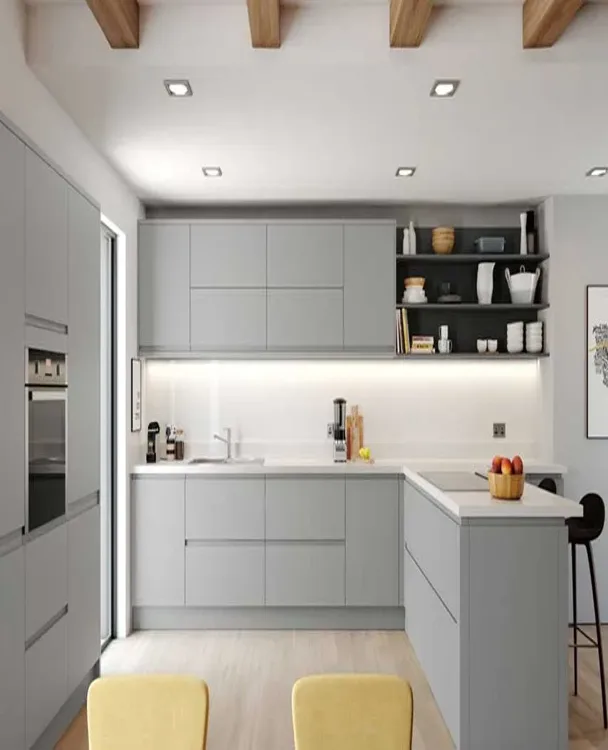
- L-shaped layouts: Utilize corner spaces effectively without requiring extensive wall space. Position the sink in the corner or use it for additional prep space. These work well for apartment kitchen design in open-concept homes.
- U-shaped layouts: Maximize storage by utilizing three walls. This configuration requires at least 8 feet of width and works best in square or rectangular rooms. Install lazy Susans or pull-out drawers in corners to prevent dead space.
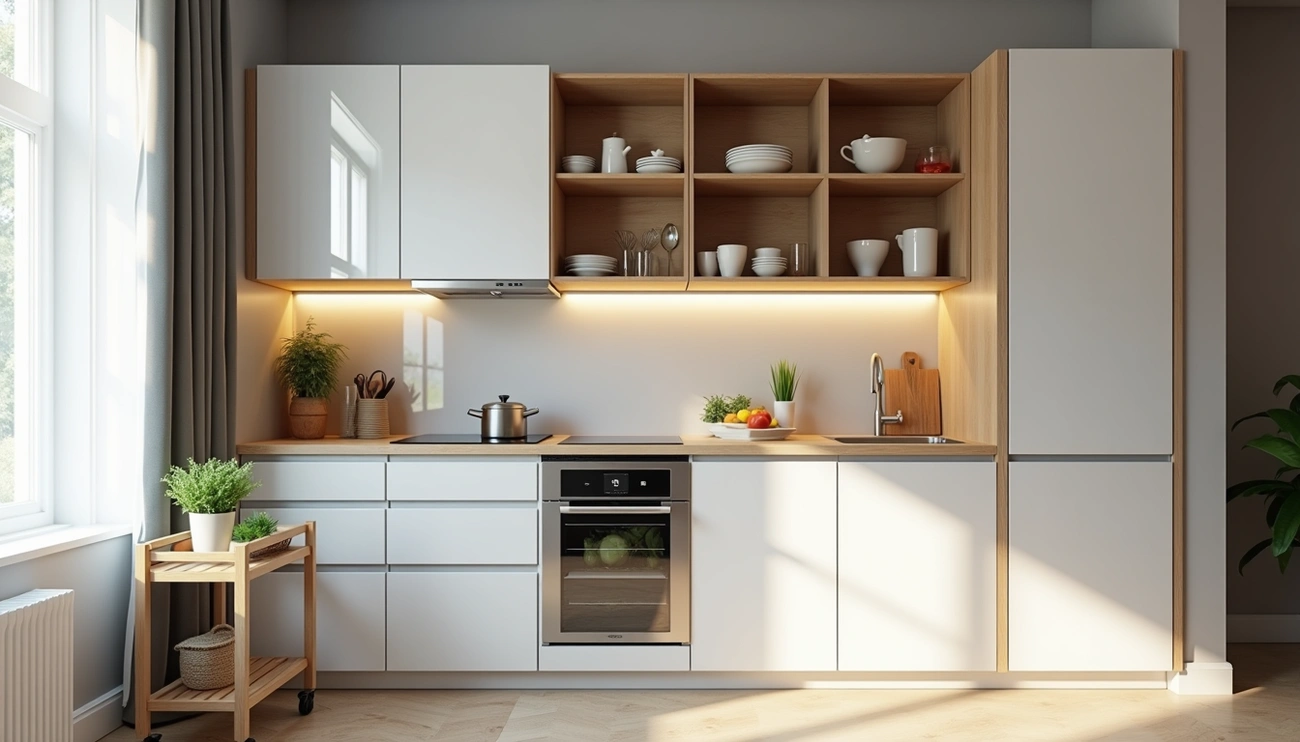
- Single-wall layouts: Ideal for continuous bare wall stretches in studio apartments or open floor plans. The linear arrangement keeps appliances within easy reach and frees surrounding space.
Understanding the Work Triangle Principle
Position your refrigerator, sink, and stove to form an efficient work triangle. Each side of this triangle should measure between 4 and 9 feet. The total perimeter should range from 12 to 26 feet for optimal workflow.
This arrangement minimizes steps during meal preparation. You gather ingredients from the refrigerator, move to the sink for cleaning and prep, then transfer to the stove for cooking. The principle dates to 1940 when University of Illinois architects applied geometric rules to streamline kitchen workstations.
Cabinets should not intersect triangle pathways by more than one foot. Avoid major traffic flow through the triangle, and keep full-height obstacles like tall cabinets away from any two triangle points. In single-wall layouts, adapt the traditional triangle by placing these elements along the same wall to minimize distances.
Step 2: Plan Your Storage and Organization System
Storage calculation transforms guesswork into science for modular kitchen planning. Designers recommend 1.5 to 2.5 cubic meters of usable storage per person. A couple needs approximately 3 to 5 cubic meters, while a family of four requires 6 to 10 cubic meters. This includes base cabinets, wall units, drawers, and larder storage.
Calculate Your Storage Requirements
Modern modular kitchen design favors drawers over traditional cupboards for base storage. Aim for 60 to 70 percent of base storage as drawers and 30 to 40 percent as cupboards. This ratio reduces the need to kneel and search through dark cupboard corners. A medium-sized family kitchen typically needs four to six deep pan drawers, two to three medium drawers, one to two cutlery and utensil drawers, and at least one tall larder or pantry cupboard.
Plan roughly one linear meter of base cabinetry per square meter of floor space. In a modular kitchen for small apartment measuring 20 square meters, target 18 to 22 linear meters of combined base and wall storage. Taking cabinets to the ceiling increases overall storage by 20 to 30 percent without expanding the footprint.
Choose Between Cabinets, Drawers, and Open Shelving
Closed cabinets deliver maximum efficiency through deep, customizable storage. Base cabinets store heavy appliances while overhead units reaching the ceiling provide secure storage for various items. Custom insert options include pull-out trays, spice racks, and appliance lifts. These cabinets utilize vertical space more efficiently than open alternatives.
Open shelves excel at displaying rather than maximizing space. They make everyday items accessible and unloading the dishwasher becomes effortless. However, open shelving cannot handle heavy or bulky items and provides no hidden storage for odds and ends. Combining both styles works well in modular kitchen in small apartment layouts. Install closed cabinets for less attractive kitchen items while using open shelves for pretty dishes and frequently accessed mugs.
Drawers typically cost more than other options, with trays being the lowest-cost solution. Shelf costs vary depending on quality and materials chosen.
Utilize Vertical Space with Tall Units
Wall space from counter to ceiling represents dozens of square feet of potential storage that typically goes unused. Very narrow pullout cabinets work perfectly for oils and herbs located right next to the cooktop. These shallow spaces, sometimes carved between wall studs, can store spices and bottles while creating display areas.
Hanging pots and pans on otherwise empty walls frees precious cabinet space. Use rails specifically designed for this purpose, ensuring proper anchoring to wall studs. Further storage opportunities exist in barely-a-few-inches spaces next to refrigerators, ideal for wine cubbies or plate storage.
Install Corner Storage Solutions
Corners provide substantial storage but often make items difficult to access. Lazy Susans remain the classic solution, featuring shelves that spin in circles with cheese-wheel shapes and notches fitting the doors when closed. Alternatively, models integrate doors into shelving, allowing the entire cabinet to spin open or shut in one motion.
Spinout shelves rotate out of the cabinet instead of just spinning within it, allowing access to more shelf area simultaneously. Advanced pullout systems use multiple rectangular shelves connected by complex hinges and tracks, maximizing shelf space and reach. The first shelf pulls out with the door and brings the other along behind it.
Corner drawers pull directly out at 45-degree angles while maintaining 90-degree fronts for clean appearance. These work well for storing cooking utensils, seasoning jars, and other small items fitting into odd angles. Independently rotating baskets in corner storage systems allow separate storage for different item types without mixing.
Step 3: Design Your Kitchen Zones for Better Workflow
Workflow zones group kitchen elements by function rather than random placement. This approach reduces unnecessary steps during meal preparation and keeps related items within arm’s reach.
Create a Cooking Zone
Position your cooktop, oven, and microwave together as the core of this area. Store pots, pans, and lids in cabinets directly below the cooktop for immediate access. Large cooking utensils like spatulas, wooden spoons, tongs, and ladles belong in an open canister on nearby countertops or in a dedicated drawer.
Install lid organizers or racks inside cabinets to keep pots with their corresponding lids. A magnetic strip next to your oven provides convenient knife storage during cooking. Besides these basics, add a spice drawer or pull-out rack within this zone. Herbs, spices, and cooking oils should remain accessible without requiring steps away from the stove.
Place this zone between your prep area and storage zones for seamless ingredient transfer. Accordingly, maintain heat-proof counter space adjacent to the cooktop for setting down hot dishes.
Set Up a Meal Prep Zone
Allocate counter space measuring at least one meter in width for chopping and mixing tasks. Position this area between your cooking and cleaning zones. Store cutting boards vertically using dividers to prevent tipping and allow easy selection.
Keep knives in countertop blocks for quick access while preparing food. Mixing bowls, measuring cups, strainers, and prep tools belong in nearby cabinets or drawers with organizers. Small appliances like blenders, mixers, and food processors need designated shelf space within this zone.
Prior to meal preparation, having frequently used oils, spices, and sauces stored here eliminates constant trips to the pantry. Install proper task lighting above this area to reduce eye strain during detailed cutting work.
Designate a Cleaning Zone
Group your sink, dishwasher, and garbage bins together for efficient cleanup. Store dishes, cutlery, plates, and bowls within one step of the dishwasher to simplify unloading. Under-sink cabinets should house cleaning supplies like sponges, brushes, dish soap, and sprays.
Add drying racks in this zone for air-drying clean dishes. Kitchen towels fit well in under-sink storage alongside cleaning materials. Position this area near your prep zone for easy vegetable washing and disposal access during chopping.
Plan a Storage Zone for Consumables
Place your refrigerator and pantry adjacent to each other for efficient grocery unpacking. Essentially, this zone should sit next to your prep area for seamless ingredient gathering. Organize pantry items by frequency of use, keeping everyday staples like bread, pasta, and rice at eye level. Less frequently used items belong on higher or lower shelves.
Install bottle pull-outs for sauces and oil containers. Maintain counter space beside the refrigerator for setting down groceries or multiple ingredients during cooking.
Step 4: Select Materials, Finishes, and Color Schemes
Material choices directly impact both the longevity and daily functionality of your modular kitchen. Cabinets and countertops endure constant use, moisture exposure, and temperature fluctuations in compact cooking spaces.
Choose Durable Cabinet Materials
Wood veneer brings authentic hardwood grain while offering superior dimensional stability through engineered substrates. This makes it less prone to warping compared to solid wood. For modular kitchen in small apartment settings, matte and supermatte finishes hide fingerprints exceptionally well. FENIX NTM supermatte laminate even allows thermal repair of micro-scratches using heat.
Thermofoil provides ultra-easy maintenance thanks to one-piece construction without seams where dust accumulates. Textured thermofoil hides smudges and scratches effectively. High-gloss acrylic offers extreme durability and wipes clean easily, though fingerprints show more readily. Plywood remains the safest choice for most applications, offering cross-grained strength and reliable screw-holding capacity.
Pick Countertop Materials That Suit Your Needs
Quartz stands as your best overall choice, resisting stains, scratches, heat, and bacteria. Its non-porous surface requires no sealing. Granite delivers natural elegance and heat resistance but needs resealing every 2-5 years. Marble adds timeless sophistication yet requires coating several times yearly due to high porosity. Solid surfaces like Corian create seamless, non-porous installations with integrated sinks.
Select Light Colors to Maximize Space
White countertops maximize light reflection, instantly making spaces feel more open and airy. Light gray adds modern sophistication while maintaining brightness. Using one dominant color eliminates visual distraction and creates cohesive appearance. Restrict your palette to two or three main colors to keep the modular kitchen for small apartment neat and visually appealing.
Consider Easy-to-Clean Finishes
Washable finishes near cooking zones allow wiping away oil splashes and stains without damaging surfaces. Quartz countertops fight stains and wipe clean easily. Flat panel cabinets with matte finishes hide dust and fingerprints better than high-gloss alternatives. Clean wood veneer gently with pH-neutral oil soap diluted in warm water.
Step 5: Plan Lighting and Add Smart Accessories
Proper lighting multiplies functionality in compact cooking spaces. Layered lighting combines three types: ambient for general illumination, task for specific work areas, and accent for highlighting features.
Install Task Lighting for Work Areas
Task lighting illuminates countertops where you chop vegetables and read recipes. Position spotlights, pendant lights, or strip lights directly above prep zones. Pendant lights over sinks provide soft task lighting for washing dishes. For islands, use pendants with transparent or open shades to avoid visual clutter. Space these fixtures 30-36 inches above countertops.
Add Ambient Lighting for Overall Brightness
Recessed downlights with wide beam spreads provide clean, unobtrusive general lighting without cluttering the ceiling. Install one spotlight for every 4 to 6 square feet of ceiling space, or space recessed lights 4 feet apart. Flush mount fixtures work well in low ceilings, hugging the surface instead of taking overhead space. Stick to 2700K (warm) or 3000K (neutral-white) throughout your modular kitchen to avoid visual dissonance.
Include Under-Cabinet Lighting
LED strips or puck lights mounted under cabinets illuminate countertops and minimize shadows. Position strips toward the front edge for task lighting or toward the back for ambient effects. Install dimmers to adjust brightness from 100% down to 1%.
Invest in Space-Saving Accessories
Wall-mounted sconces with adjustable arms provide targeted lighting while freeing ceiling space. Smart lighting systems allow smartphone control of brightness and color temperature.
Conclusion
You now have a complete roadmap to transform your compact cooking space into a functional, beautiful kitchen. From measuring accurately and selecting the right layout to optimizing storage, creating efficient zones, and choosing durable materials, each step builds toward a space that works for your lifestyle.
Small kitchens demand smart planning, but they don’t require compromise. By all means, start with proper space assessment and let each decision flow naturally from there. Take your time implementing these strategies, and your kitchen will reward you with years of comfortable, efficient cooking.
The perfect small apartment kitchen isn’t about square footage, it’s about thoughtful design.